CE121L - Microprocessor System Design
Laboratory 6
Week of February 24, 1997
This is the last incremental laboratory assignment, and explores
connecting analog input and output to your system. The remaining weeks
will be devoted to the project.
- Familiarize yourself with the ADC manual section and the DAC
data sheet.
- Reread the data sheets.
- Analog components require special attention when hooked up to
digital circuits. First, ensure that you have many bypass capacitors
in your circuit. In general, you should keep the analog and digital
power rails separate. This is may be impractical, but if you can, as
near to the power supply as possible separate out an analog ground
signal and connect it to the AGND terminal of the ADC, the pin
10 GND of the DAC, and all other analog grounds. Analog power
should be treated similarly. Note that the data sheets explicity
specify which signals use analog ground and which use digital ground.
- A signal must be sampled twice as quickly as its fastest
component sine wave to accurately replicate the waveform. It will be
necessary to hook up a low-pass filter to your ADC input to eliminate
any high frequency signals. A simple passive low-pass filter sends
 through a resistor to
  and connects
the node to analog ground with a capacitor. The
cutoff frequency of this circuit will be approximately
and connects
the node to analog ground with a capacitor. The
cutoff frequency of this circuit will be approximately  . (This is the point at which there is a 3dB attenuation between
the signals, or
. (This is the point at which there is a 3dB attenuation between
the signals, or  : attenuation in dB
 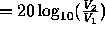 .) (If interested, you can use your
op-amp to make an even better filter; if needed, use the op-amp to
shift voltage levels.)
.) (If interested, you can use your
op-amp to make an even better filter; if needed, use the op-amp to
shift voltage levels.) - The telephone system features frequency responses up to 3kHz,
implying a sampling rate of 6kHz. We can do a bit better -- shoot
for a frequency responses up to 10kHz, sampling at 20KHz.
Determine values for R and C that will produce a 3dB cutoff
frequency of about 10kHz, and check to see if the DAC and ADC can
handle frequencies up to 20KHz.
- Reread the DAC data sheet, in particular how to set the output
range to between 0V and 2.56V.
- Diagram all connections to DAC and ADC in your lab notebook
before lab.
- Write a program to send a wave out the DAC and to read it in
from the ADC and store it in memory. Create a table T1 in memory
(either by copying from EEPROM or running a program), using 1024
locations, of a wave. Write a program loop that will read values from
T1, write them out the DAC, and then read them in again into another
table T2. Do this continuously so you can watch it on the scope.
When a key is pressed (an interrupt), switch tables, so that you are
reading from T2 and writing to T1.
- Check the performance of your low-pass filter using one of the
function generators in the lab. Record the attenuation at various
frequencies. Be sure the scope probes are on the 10
 setting!
 - Verify the hookup by reading a number in from the keyboard,
outputting it to the DAC, reading in on the ADC, and writing to the
hex display. Use a scope to check that the DAC output voltage
corresponds to your key input.
- Run the program described above, recording the input and
output waveforms with the scope. Does the waveform degrade as you
continue to switch tables? How does the low-pass filter affect your
waves?
- Hook up the DAC output to one of the audio amplifiers (available
at the desk). Run the program on this circuit, both observing the
waveforms on the scope and listening to them.
Richard Hughey
Thu Feb 20 11:34:35 PST 1997